Do you have a campervan conversion project in the works? If so, you'll want to read this guide. In it, we will teach you how to professionally carpet line your campervan. This is an important step of your build. It will not only make your van look great, but also help keep it insulated and protect you from the elements.
DIY Carpet Line your Campervan
DIY campervan conversions are all the rage. And while we love a good project as much as the next person, there’s one area that can make or break your conversion: carpeting. That's right, folks, we're talking about carpet lining your campervan conversion.
Carpet lining if done professionally can add some serious value to your van. If done badly it can really ruin the entire project. The sign of a good carpeting job is that you don’t even notice it’s there. A bad job sticks out like a sore thumb.
Carpet also does a great job of absorbing sound, which means you can listen to your favourite music or podcast at full blast without annoying your camping neighbours. And when it comes time to sell your campervan, having your van carpeted will help it retain its value better than unadorned floors and walls.

What type of carpet do I need? - Four Way Stretch Campervan Carpet
There are a few different material options on the market to use when you carpet your campervan conversion. The most commonly used is Four Way Stretch Carpet . It’s pliable and has a slight stretch, with a nice soft feel.
Because of the stretch in the fabric, this is what we recommend a first time converter uses. You might see Alcantara being used in more high-end conversions. However this can be pretty tricky to work with, as well as costing much more.
Four Way Stretch Carpet means it’s flexible and mouldable around all the curves and edges of the van. It’s great at getting around the most difficult areas, such as around the windows and wheel arches. It means you don’t need to spend lots of time trying to cut perfect edges and it’s easy to make it look great.
Most suppliers offer Four Way Stretch Carpet in colours, such as black, dark blue and smokey grey. This means you can choose the colour that will go with the rest of your interior theme.
In terms of choosing a colour, that all comes down to personal choice. The most popular colours are Antrathise, Smoke and Silver. Steer clear of the lighter fabrics. These can get dirty very easily which will age your van over time.

What tools do I need to carpet line my van?
Carpeting your van is a great way to add some personality and style to your ride. But before you start carpeting, you'll need to gather some tools:
- Mask
- Goggles
- Gloves
- Stanley blades
- Trim tools
- Carpet - we suggest Four Way Stretch Carpet
- Heat resistant spray glue (normal spray glue will peel in hot weather
Step by Step - Carpet line your van
- Measure the length and width of your van
- Purchase all the carpet at the same time
- Remove all the interior trims and panels from your van
- Cut the carpet leaving extra for the curves
- Add the glue to the carpet
- Add glue to the walls of the van
- Stick the carpet to the walls
- Push the carpet in to the curves and corners
- Trim the excess carpet

How much carpet do you need?
But how much carpet do you need? Well, that depends on a few factors, including the size of your van and the kind of conversion you're doing. We’ve done a calculation for the most popular van types:
- Long Wheel Base Volkswagen Transporter T6 Van including roof: 15 metres x 2 metres
- Short Wheel Base Volkswagen W Transporter T6 Van including roof: 12 metres x 2 metres
- Short Wheel Base Volkswagen Caddy including roof: 8 metres x 2 metres
- Volkswagen Caddy Maxi including roof: 10 metres x 2 metres
If your van isn’t listed then you will need to measure your vehicle before you order your carpet. This can be a bit daunting, but it's actually not too difficult. Just make sure you add a metre or two onto your order.

Prepping your van for carpeting
When preparing your van for carpeting, make sure to clean and vacuum all of the panels first. Use Tar & Glue Remover if needed on any oils or grease that might still be present on the van. Chemicals could be present from the manufacturing process.
This is very important if your van is second hand. You might not know what the vehicle was used for before you got it. This will avoid dirt getting stuck in between the carpet and the walls as well as dust becoming trapped during the installation process. There are some chemicals that might react with your glue to prevent it from sticking. Very important to give the vehicle a proper clean before you start.
It’s the small details like this that will take your carpeting work from a novice job to a professional conversion!
Removing the Trim and Panels
It’s best to use a trim tool for this part of the job. You can buy trim tool kits for less than £10. They are ideal for removing trim, door panels, mouldings and all the other clips and fasteners. It will make converting your van much easier - Well worth the small investment.
Using the trim tool, remove all of your plastic panel poppers and panels from a van. Make sure you keep them in one place so that when it comes time for putting everything back on again - they will be right where needed! You'll also need to remove any door rubbers as well; these can cause problems during installation if left unchecked.
Pro tip - keep all these small poppers in a freezer bag clearly labelled. It’s a real pain at the end if you’ve lost any of these - we’re speaking from experience here!

Soundproofing and Insulation
Whether you're a full-time vanlifer or you just like to hit the open road on weekends, one of the most important things to consider when outfitting your Campervan is how to soundproof and insulate it. Not only will this make your time on the road more enjoyable, but it will also help to extend the life of your Campervan by protecting it from the elements.
There are a number of different ways to soundproof and insulate your Campervan, and the best approach will depend on the specific needs of your vehicle. For example, if you're looking to reduce road noise, you might consider installing sound-deadening under your carpet.
Alternatively, if you're mostly concerned about keeping your Campervan warm in winter and cool in summer, you might want to focus on installing insulation in key areas such as the walls, ceiling, and floor.
Professional converters tend to put a layer of sound proofing, a layer of insulation and then carpet line the sides. This gives a real solid and secure feel to the build. The most popular insulation used by professional converters is Dodo Soundeading. A good layer of soundproofing means you can move onto the carpet for campervan walls.
Although this part of the build can seem expensive, it’s an area where it’s worth investing in good quality products. They will make all the difference to the warmth of your van.

Cutting the carpet
Make sure you use a sharp blade to cut through the carpet. Four way stretch carpet should be very easy to cut through. You might only get a few cuts per blade. Depending on the size of the van you’re doing. Keep swapping to a fresh blade when you start to feel resistance. This will keep your cuts clean.
Once you have your carpet cut to length, it’s time to get on with the glue.

Method for using adhesive when carpeting your van
People get pretty nervous about this bit. But it’s honestly much easier than you think. The most important thing is to use enough glue that will prevent you from seeing “bubbling” where the carpet has peeled off the van.
Spray the van wall with your adhesive. Make sure you use a scrap of cardboard or similar to stop overspray from getting on the van. Work from side to side, then change direction to create a criss cross pattern. This will help you avoid missing areas. When the van wall is coated in glue, lay out the carpet on the floor and spray the glue in a criss cross pattern once again.
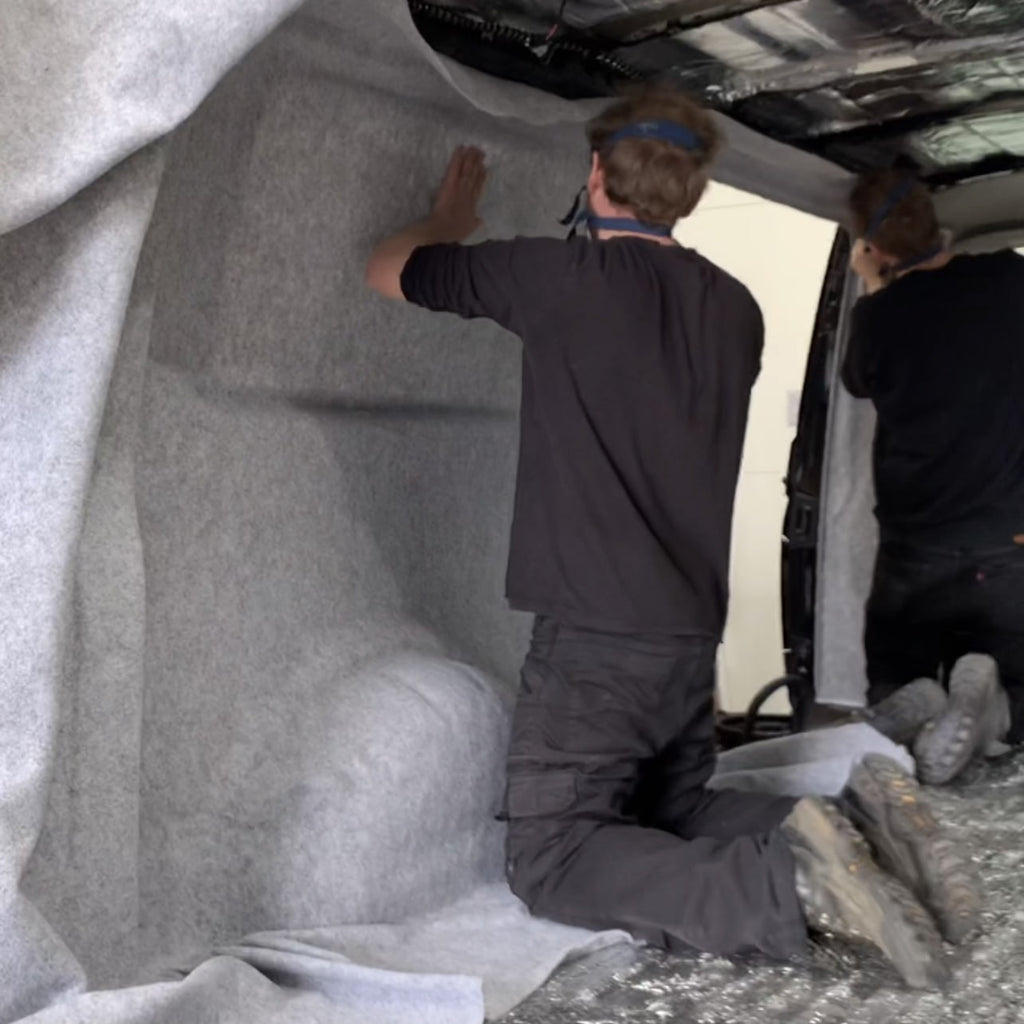
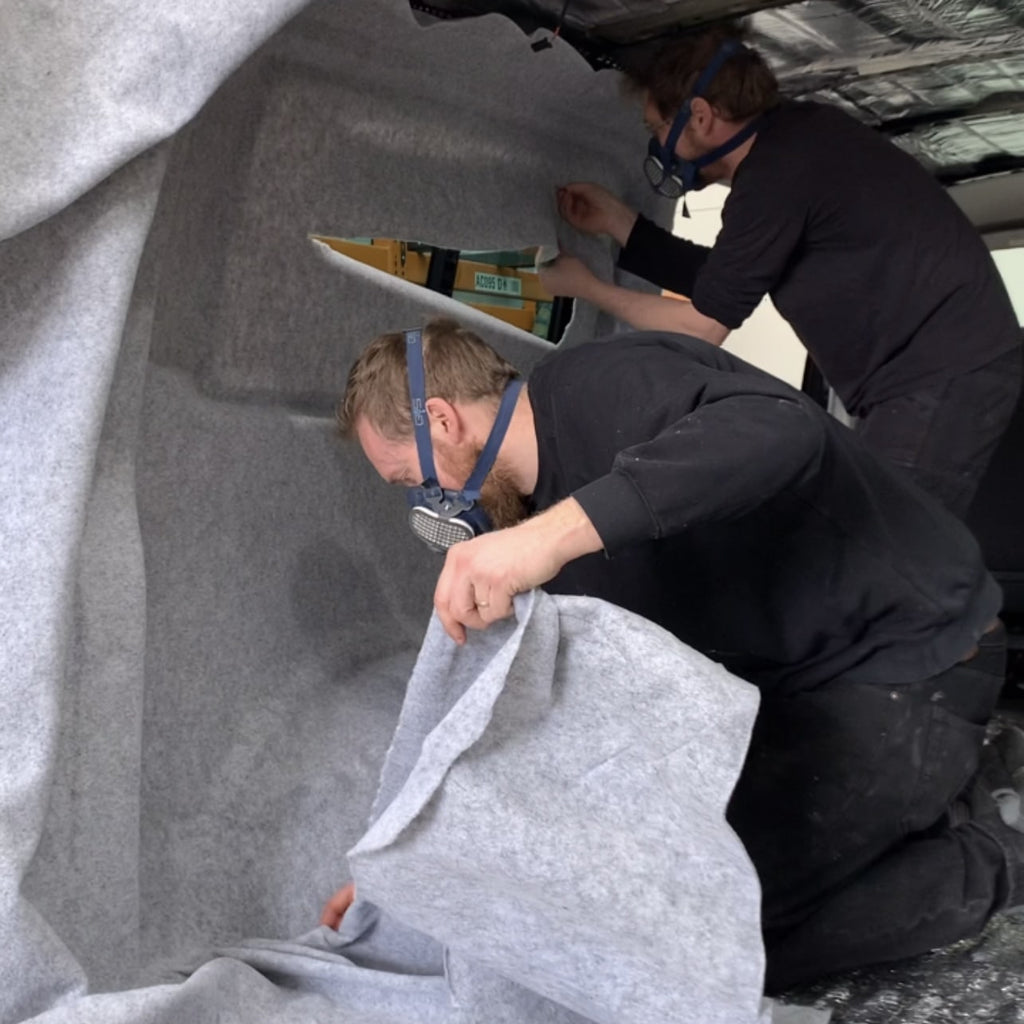
Enlist a friend (or child) at this point and lift the carpet into the van. Begin pressing the carpet from the top moving down to the bottom. Just try and get contact at this stage and start gradually removing the wrinkles.
If you’re not happy with it. Feel free to remove the carpet, re-glue and reapply. Just don’t let the carpet touch, to prevent it from sticking to itself. The final step is to use a sharp blade to trim the excess carpet.
Preparation is key here, get everything ready before you apply the glue.

Professional Campervan Capetting
If this doesn't sound like your cup of tea, Wildworx offers a full range of Campervan Conversion packages if you don't fancy doing it yourself. Check out our Campervan Conversion options.
The Cost of carpet lining and insulation from Wildworx For SWB vans our carpet lining and insulation package includes, insulation and sound deadening full interior with high quality PeaceMAT campervan sound deadening insulation. We use high performance aluminium butyl panel sound deadening material. This is fitted inside the OEM (interior) panels.
Vehicle is then carpet lined with a four way stretch Campervan Carpet and of course with a colour of your choice. This comes at £690. For LWB vans our carpet lining and insulation package includes, insulation and sound deadening full interior with high quality PeaceMAT campervan sound deadening insulation.
We use high performance aluminium butyl panel sound deadening material. This is fitted inside the OEM (interior) panels. Vehicle is then carpet lined with four way stretch Campervan Carpet and of course with a colour of your choice. This comes at £725.

Wildworx Carpet Line Packages
Whether you're just getting started on your campervan conversion or you're nearing the end of your build, don’t underestimate the power of carpet lining your van. No matter what approach you take, soundproofing and insulating your Campervan will go a long way towards making it a more comfortable and enjoyable place to spend time.
By making your van warmer, it will even extend the time you can use it in the Autumn, Spring and even Winter, giving you more nights on the road. So what are you waiting for? Get carpeting!
Want to know about the next stage of your conversion? Check out our guide on Campervan Kitchens.
Wildworx also offers a range of ca Campervan Accessories. Including awnings, bike racks and campervan solar panel kits.
Get in touch with our team who will be happy to talk through your project.


